ATLAS Magnet Model
ATLAS Magnet Model
The ATLAS detector, the largest particle detector at the LHC, is one of the most complex machines ever built. However, due to its complexity, explaining the ATLAS detector at a high-school level can be challenging. Below, we show how to use simple materials (straw and cardboard) or 3D printers to build a model of the toroidal ATLAS magnet system. We also suggest learning activities for the physics classroom.
There are different ways to use this toroid model in your classroom. To build the model with high-school students, we recommend a stepwise assembly process. The assemble and exploration can be guided by our student worksheet ( German Version ). In any case, we recommend comparing the model toroid with the real ATLAS toroid and use this opportunity to discuss the role of models in physics. For the assembly, a pair of students can first make one coil, connect it to a power supply and then explore the magnetic field of their coil. Magnetic field lines can help to visualise the field and can be drawn with the help of compasses or other probes such as 3D compasses or smartphone apps such as MagnetMeter. Subsequently, students connect a second coil and study the superposition of the two magnetic fields. When the full toroidal system is assembled, the copper wires of the coils need to be soldered together.
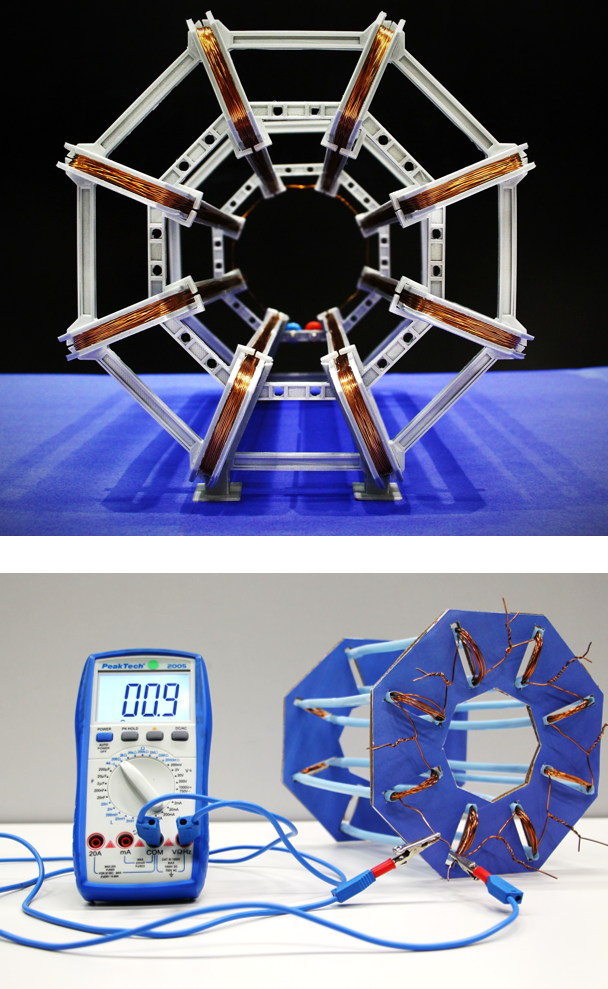
If you don't have access to a 3D printer, you can build a toroid using everyday material such as cardboard and straws, see the picture at the right.
Material
- drinking straws (approx. Ø 8 mm, 22 cm long)
- enamelled copper wire (Ø 1 mm, 30 m length) >> 7 turns per coil
- cardboard (approx. 25 cm x 50 cm)
- cutter, pliers, lighter, ruler
- sandpaper to remove the enamel layer (optional)
- adhesive tape, glue
- print-outs of our template for 2D printing (A3)
- soldering iron and solder (optional)
- 2 x 4 mm banana sockets
- experiment cables with 4 mm banana plugs
- power supply (12 V DC) or battery pack
- multimeter (optional)
Instructions
- Step 1: A piece of cardboard can be used as a placeholder between two straws. The red template (template for 2D printing) should be printed out and glued to cardboard. Then attach a straw to both long sides with adhesive tape.
- Step 2: Now make the coil using enamelled copper wire (approx. 30 m in total). For every coil, you need 7 turns (approx. 3.5 m wire). In addition, approx. 10 cm each should be added at both ends to later connect the coils. Once the coil is finished, the placeholder can be removed.
- Steps 1 and 2 are repeated eight times.
- Step 3: With the help of the blue template (template for 2D printing), make the support structure for the eight coils. Here, the template is printed on paper and glued to a piece of cardboard. Then all white areas are removed with a cutter. Step 3 is repeated two times.
- Step 4: The coils are now inserted in the slots provided by the support structure. Make sure that all open coil ends are on the same side. If the cardboard folds slightly, it is advisable to repeat step 3 four times and glue two cut-out parts together - or use stronger cardboard.
- Step 5: Remove the insulation at the ends of the copper wire with the help of a lighter or sandpaper. The outer wire end of a coil is then twisted with the inner wire end of the adjacent coil. For better connectivity, you can solder the ends together. In the end, 2 wire ends should remain untwisted to connect them to the power supply.
We developed a 3D-printable functional model of the ATLAS toroidal magnet system. Here, our video "Build your own ATLAS magnet: a functional 3D-printed model" includes detailed building instructions. Please watch the video first if you want to build your own toroid model. Please also read our paper "A Functional 3D-Printable Magnet Model of the ATLAS Toroid", which includes more information in the design & construction process as well as ideas for the classroom use.
Below you find a simplified 3D-printalbe model: less parts and no gluing.
Material
- 3D printed parts (8 coil frames, 16 inner struts, 16 outer struts, and 4 feet - download all files from http://www.thingiverse.com/thing:1722230)
- cyanoacrylate glue (super glue)
- cutter, pliers, lighter
- enamelled copper wire (Ø 0.5 mm, 500 m length)
- soldering iron and solder
- 2 x 4 mm banana sockets
- experiment cables with 4 mm banana plugs
- power supply (12 V DC) or battery pack
- multimeter (optional)
- sandpaper to remove the enamel layer (optional)
We developed a second 3D-printalbe model of the of the ATLAS toroidal magnet system. This simplified model has less 3D-printed parts, is more robust, and its assembly is faster and doesn’t need gluing. Besides the assembly of the printed parts, the construction of the simplified model is identic to that of the first model: Build your own ATLAS magnet.
Material
- 3D printed parts: front coil support, rear coil supports, 8 coil frames, download all files from https://www.thingiverse.com/thing:4920535
- cutter, pliers, lighter, sandpaper
- enamelled copper wire (Ø 0.5 mm, 500 m length)
- soldering iron and solder
- 2 x 4 mm banana sockets
- experiment cables with 4 mm banana plugs
- power supply (12 V DC) or battery pack
Watch a short teaser of the instruction video on Twitter or Facebook
🛠 Let’s get toroidal this week!
— CERN (@CERN) June 3, 2020
Build your own functional model of the magnet system of the @ATLASexperiment detector and study its magnetic field.
📒 Retrieve the full instructions: https://t.co/9sBjRWQYOc pic.twitter.com/7uMbV05qPu
You can download this video here CERN CDS Videos: Short Teaser & Full Video